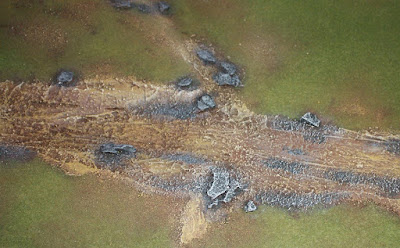
Anyway... I wanted to add some more color to the board to break up all of the green and brown so I painted the rocks and assorted rubble I added earlier (Waaaay back in Part Six) in gray tones. The exact colors don't matter as long as you have a dark, medium, and light gray (or can mix them).
The first step is to pick out all of the areas in the dark gray. All of the paint is applied in a stippling or dabbing motion to create uneven edges. We want the gray areas to blend into the surrounding areas.
Next we are going to drybrush on the middle gray tone. I realized I throw around techniques and if you are new to modeling you may not know what I'm talking about so let me take a second to explain 'drybrushing'. Basically, you want to dip your brush into the paint - don't load it up, maybe just cover a third of the bristles. Then wipe the brush across a paper towel/paint rag/whatever until most of the paint seems to be gone...
Now back to the middle gray - lightly draw the brush across your textured surface and you'll see the paint is transferred to only the highest points and sharpest edges. We want the first color to show through. I did this repeatedly in Part Eight, but I didn't really explain it. Hope that helps if I confused you. Feel free to ask questions if you're still stumped! By the way, this technique will ruin your brush so keep a few old ones hand for dry brushing.
The last part of this process is drybrushing VERY lightly the... err.... light gray. For me, one brush load did three boards. This makes these details 'pop' and really finishes off the rocks.
Next time we are going to add one more layer of color and texture...


Clarrie - many thanks for posting this series of 'how-tos' on terrain boards. It will make an excellent resource for gamers everywhere. I know I will be following your method and using the techniques demonstrated to do my own for our gaming group's demos.
ReplyDeleteOn techniques - I think the effective dry-brushing is the key for as you say, once applied properly, it really makes terrain features 'pop' visually. As a graphic artist yourself you'd be aware that in order for things to work visually on scenery that is more than 30 times smaller than real life, you have to exaggerate the visual effect. Rocks left 'au natural' just don't work at that scale - you have to paint them and highlight with dry brushing to make the necessary visual impact.
I've seen it explained (and accompanied by good photos) in numerous books, mags etc, - the Games Workshop book on scenery touches on terrain boards & shows most of the techniques BUT you have done us a real service by pulling it all together in a step-by-step process illustrated with great photos.
I know you've just done RtoE and preparing for Historicon BUT you should seriously consider collating all this into a publication of your own.
In my opinion the preparation you can show of both the figures plus the terrain & scenery to game them on in a step-by-step guide would have great appeal to wargamers old and new.
Just a thought.
Thanks again for your informative and inspiring posts.
Doc.
Thanks, Doc!
ReplyDeleteActually Barry and I have talked about doing something together along these lines. We have a pile of projects on the list and a painting/terrain manual is one of the things on our list.
Clarence - just wanted to say that I'm really enjoying your terrain posts. I really wish I had the space and talent to make my own terrain!
ReplyDeleteBest wishes
Giles
Have you thought about doing a 'one-stop-shop' approach? For example, you could tie it in with RtoE and say, the Peninsular campaign - a few selected battles ranging in size from skirmish (the fight at Coa?) to Talavera - there's plenty of different types of action to game -its got it all really. You do the armies - figures involved and examples of painting them (perhaps one from each side per battle), the scenery and terrain specific to it in the same step-by-step process, with plenty of eye candy shots of course up until the finish, then a shot or two of the action. I don't think anyone has done this in a comprehensive manner as yet and seeing how you and Barry have done RtoE and the stuff on Quindia and on your blog - well, it just seems obvious to me anyway as its the sort of thing I'd love to do!
ReplyDeleteJust another thought ;-)
Cheers,
Doc
Could you post a couple of pix showing a longer range view of several of the boards placed together so that we can see how everything comes together? The close up pix are nice for the details but in some cases I can't distinguish between the road and the river bed and the field.
ReplyDeleteJim
Absolutely... I'll drop one in the next post...
ReplyDelete