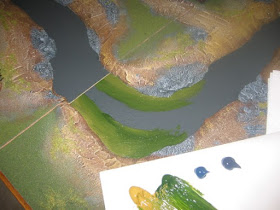
The technique employed for painting the river is different than that employed for the banks. I want to blend everything as I go so the thing is to work on short sections at a time. I start on the outside with my brightest color. The flash has reacted strangely with the wet paint and everything appears more "day glow" than it is. The bronze color is actually more of a brown green and mimics the shore fading under the water quite nicely.
I basically blend the colors from light near the banks to dark in the middle. If you aren't familiar with blending paint, practice on a scrap piece of card board until you get the hang of it. It's actually easier than drybrushing. You just have to work quickly.
The river is almost finished. What will bring it to life is the varnish, but before we do that, I want to add a little more detail to the river. Nothing says "water feature" like reeds. For this I am going to use an old wisk broom, a pair of scissors, and my trusty hot glue gun.
Grab a small group of bristles and trim off a section. The exact length doesn't matter because we're going to trim them shortly.
Apply a small blob of glue where you want to position the plant...
Press the bristles into the glue and count "one-one thousand, two-one thousand, three-one thousand..."
Then gently fan the bristles out gor a more natural look.
After about five minutes, these things will be stuck forever! You can trim them with scissors to the desired length (and yes, you need to risk the vacuum one more time). Again, you might want to try this on a scrap of card before doing it on your boards until you feel comfortable with the technique.
I just added a dozen or so per board, but you could really go to town and cover the banks. As this is wargames terrain, I really just wanted to give an impression of water plants... after all the goal is to play games on these things. The next article is the last one for these boards and will really bring the river to life.


This is really gorgeous work. Well done.
ReplyDeleteThis series of articles were the inspiration for my own terrain boards - thanks for re-posting them!
ReplyDeleteThanks, guys - one more post next week and the series will be complete...
ReplyDeleteClarence, this is a superb series of blog posts. Well done, and thank you.
ReplyDeletePhil